Email & Google Auth Setup
This section provides a detailed explanation for setting up Email Auth and optionally enabling Google Auth using Supabase.
Configure Redirect URL
For any authentication provider you use, whether it's Email Auth or Google Auth, you need to set up the redirect URL as follows:
-
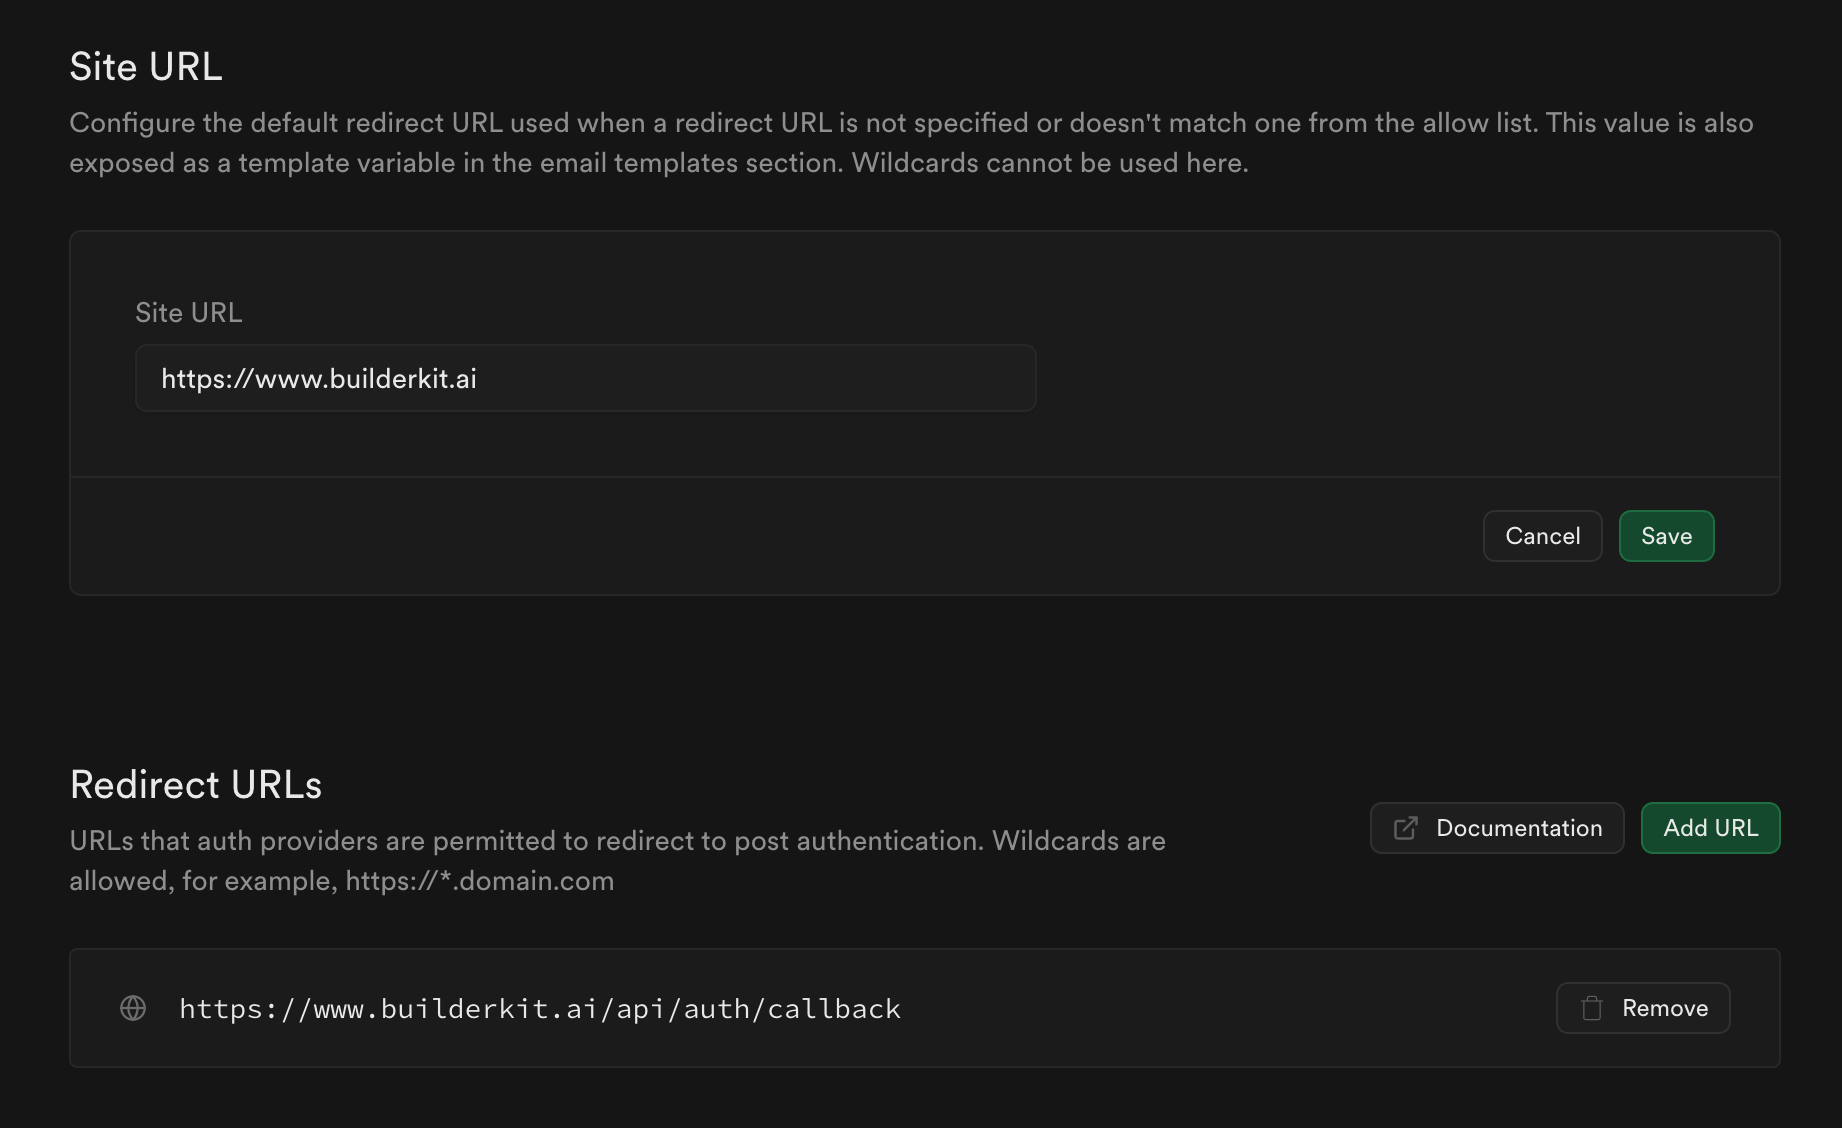
Go to the URL Configuration (opens in a new tab) page in Supabase.
-
Add the
Site URLandRedirect URLs- Site URL: The base URL of your application
- Redirect URLs:
<base-url>/api/auth/callback(in our case)
If testing locally, you can use http://localhost:3000 (opens in a new tab) as the base URL.
Configure Environment Variable
Add the NEXT_PUBLIC_APP_URL to your .env.local file:
NEXT_PUBLIC_APP_URL=<your-base-url>
# or
NEXT_PUBLIC_APP_URL=http://localhost:3000
Great! You've completed the setup. Now you can implement and use email authentication in your project.
Setup Google Auth
To enable Google login in your project, you need to configure the Google Auth Provider after you have completed the above steps.
For detailed steps on configuring OAuth Credentials in the Google Cloud Console and enabling the Auth Provider in the Supabase Dashboard, follow this documentation (opens in a new tab).
Here's a brief overview of the process:
- Set up a project in the Google Cloud Console (opens in a new tab).
- Configure OAuth Credentials for your application from the Google Console Dashboard.
- Enable the Google Auth Provider in the Supabase Dashboard (opens in a new tab).
Remember to securely store any client IDs or secrets provided during this process, and never expose them in your client-side code.
Setup Email Auth
Email auth is enabled by default.
Optionally, to turn off the Email Confirmation:
- Go to the Auth Provider (opens in a new tab)
- Click on the email option
- Switch off
Confirm email - Click on Save button